
6 Common Spray Paint Problems and How to Fix Them
Ever started a spray paint project with high hopes, only to be met with frustrating drips, uneven coverage, or a gritty finish?
There’s nothing more frustrating than when your vision for a beautifully transformed item is derailed by common spray paint problems.
But the good news is these issues are incredibly common and, most importantly, easy to resolve.
At Spray Paint Hub, we know a thing or two about spray paint and this guide will equip you with the knowledge to troubleshoot and prevent those pesky spray paint finish problems, turning potential disasters into masterpieces!

Contents:
Why do spray paint problems happen?
- Runs and drips
- Uneven coverage and patchiness
- Overspraying and a dusty finish
- Cracking, peeling and blistering
- Fish eye or crater effect
- Chipping: Lack of adhesion
Environmental factors that impact spray painting
8 final top tips for perfect spray painting
Why do spray paint problems happen?
Most common spray paint problems stem from a few key areas.
It’s rarely the paint itself that’s the sole culprit; more often, it’s a combination of preparation, technique, and even the weather. Understanding these underlying causes is crucial for preventing those frustrating spray paint finish problems before they even start.
Let’s dive into the specific issues you might encounter and, more importantly, how to solve them:
1 – Runs and drips
Problem: This classic spray paint problem manifests as paint pooling, sagging, or running down your meticulously prepared surface.
Causes:
- The primary cause is the application of too much paint in a single coat. If the coat is too thick, it can cause the paint to run.
- Holding the can too close to the surface means the paint doesn’t have enough space to atomise properly.
- Moving the can too slowly can result in the area becoming oversaturated with paint.
- High humidity can slow down drying times, giving gravity more time to pull paint downwards.
Solutions:
- Always apply multiple thin, even coats. It’s far better to do several light passes than one heavy one.
- Maintain a consistent distance of approximately 10-15 cm from the object.
- Use a smooth, continuous sweeping motion, ensuring the can is always in motion when the nozzle is pressed.
- Allow adequate drying time between coats, as specified on the paint can.
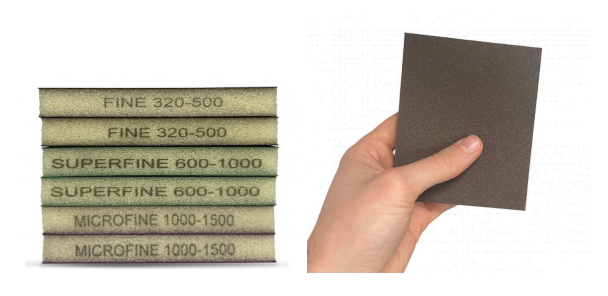
Top Tip: If you get a run, let the paint dry completely before applying another coat. Then, gently sand the run smooth with fine-grit sandpaper (e.g., 220-320 grit) until it’s level with the surrounding area. Wipe away the dust, then lightly re-spray the area.
2 – Uneven Coverage & Patchiness
Problem: You’ve finished spraying, but some areas appear lighter or darker, resulting in visible stripes or a patchy appearance.
Causes:
- You’re applying more paint in some areas than others, using an inconsistent distance from the wall or object, or an inconsistent speed.
- By not overlapping spray passes enough, you’re leaving gaps between your spray strokes.
- Before painting, inconsistent shaking of your spray paint can cause pigment to settle at the bottom, leading to an inconsistent colour.
- An uneven or inconsistent surface can cause paint to absorb differently. Without proper surface preparation, this can lead to patchiness.
Solutions:
- Shake the can vigorously for at least 1-2 minutes before use, and continue to shake regularly during use.
- Maintain a consistent distance and speed throughout your application.
- Overlap each spray pass by about 50%. Think of it like mowing a lawn – each new pass covers half of the previous one.
Top Tip: Ensure proper surface preparation and priming to provide a uniform base for your paint.
3 – Overspraying and a dusty finish
Problem: You might see fine paint particles settling where they shouldn’t. This can result in a rough, gritty, or hazy texture on or around your painted area.
Causes:
- By spraying too far away from the surface, the paint partially dries mid-air before hitting the object, creating a dusty texture.
- Windy conditions cause the wind to carry away or distort the spray pattern, leading to uneven application and overspray.
- Lack of proper masking causes paint particles to drift onto unintended surfaces.
Solutions:
- Hold the can at a recommended distance of 25-30 cm (10-12 inches).
- Choose a calm, still environment for spraying, or set up a temporary windbreaker using cardboard boxes or plastic sheeting.
- Ensure you have adequate dust sheets and masking in place to protect everything around your project.
- For a dusty finish, if it’s not too severe, you can gently sand with very fine-grit sandpaper once it’s dry, and then apply a final clear coat for a smoother feel.
4 – Cracking, peeling and blistering
Problem: This is a more severe spray paint finish issue where the paint separates from the surface, forming cracks, bubbles, or flakes that flake off.
Causes:
- Improper surface preparation means dirt, grease, rust, or moisture on the surface of your object prevents proper adhesion.
- Applying a new type of paint over an old one that doesn’t bond well, such as painting oil-based paint over latex, or applying it directly to a surface without using a primer.
- Applying new paint over uncured paint can cause trapped solvents to bubble or crack.
- Extreme temperature fluctuations or exposure to moisture after painting can cause the paint to shrink, expand, or lift due to environmental stress before it has had time to cure fully.
Solutions:
- Meticulous cleaning, sanding, and degreasing are essential before painting. Your surface must be clean, dry, and properly prepped.
- Always use compatible primers and paints for your specific material. If in doubt, stick to products from the same brand or clearly labelled as universal.
- Allow for a full curing time (not just dry to the touch) between coats and before exposing the item to harsh conditions or heavy use. This is often days, not hours.
- Ensure surfaces are completely dry before painting, particularly porous materials like wood or terracotta.
5 – Fish eye or crater effect
Problem: Small, circular depressions appear in your paintwork that resemble tiny fish eyes or craters
Causes:
- The most common cause of paint craters is the presence of silicone, wax, oil, grease, polish, or residue from cleaning products on the surface, which repels the paint.
- Tiny water droplets or moisture on the surface repel the paint.
Solutions:
- Meticulous cleaning and degreasing before painting is the only way to prevent this.
- Use a dedicated degreaser or wax and grease remover suitable for your surface.
- Ensure the surface is completely dry and lint-free.
6 – Chipping: Lack of adhesion
Problem: Your newly applied spray paint easily scratches, peels, or chips off with minimal impact.
Causes:
- A lack of primer or the wrong choice of primer for the material. The correct primer is especially important for glossy finishes.
- The surface is too smooth for the paint to grip properly and may have required scuffing.
- Similar to cratering or fish-eyes, any surface imperfections, such as moisture or grease, can prevent the paint from bonding.
Solutions:
- Always use the correct primer for your material. For plastics, laminates, or glossy surfaces, an adhesion-promoting primer is non-negotiable.
- Ensure proper surface preparation, including adequate sanding or scuffing to create a mechanical bond.
- Thoroughly clean and degrease the surface before applying any products.
But, what if you’ve followed all of the steps correctly and yet your paint still hasn’t adhered properly? In addition to considering the things you can influence, it’s also important to think about the impact the environment you’re working in can have on your finished product.
The next section will guide you through some environmental considerations before setting up your paint area.
The environmental factors that impact spray painting
- Temperature: Most spray paints have an ideal temperature range (typically around 10-30°C). If it’s too cold, the paint can dry slowly, become too thick, or not atomise properly, leading to drips or an uneven finish. If it’s too hot, the paint can dry too quickly in the air, resulting in a dusty or gritty finish, also known as overspray.
- Humidity: High humidity significantly slows drying times, increasing the risk of runs, drips, or a cloudy or hazy appearance. Low humidity can make paint dry too quickly, contributing to overspray.
- Wind: The enemy of a perfect spray paint finish, the wind can cause paint particles to drift, leading to uneven application, and can blow dust onto your wet paint. Always try to paint in a calm, still environment, or if the wind can’t be avoided, create a sturdy windbreak.
8 final top tips for perfect spray painting
Looking for a perfect finish every time? Keeping these golden rules in mind, you can drastically reduce the chances of encountering spray paint finish problems
1 – Always read the label
Every paint product is different, so always check the manufacturer’s instructions for ideal temperatures, drying times, recoat windows, and specific surface preparation needs.
2 – Proper ventilation and safety
Always work in a well-ventilated area and wear a high-quality respirator, along with safety glasses and gloves.
3 – Meticulous surface preparation
Clean, degrease, and sand or scuff every time. This is the single most important step for adhesion and a smooth finish.
4 – Shake, shake, shake
Shake your can thoroughly before starting and periodically during the project to ensure the pigments are well mixed.
5 – Thin coats work best
The golden rule of spray painting is that multiple thin coats are always better than one thick one. It prevents runs, promotes even drying, and results in a smoother finish.
6 – Consistent technique
Maintain a steady distance (25-30 cm) and speed with continuous, overlapping sweeping motions.
7 – Be patient with drying and curing
Understand the difference between paint being dry to the touch and fully cured. Rushing this step leads to most spray paint problems. If your coat is dry to the touch, it’s probably okay for the next coat, but the finished product should always be fully cured (completely dry).
8 – Choose quality products
Investing in high-quality spray paints, primers, and accessories from Spray Paint Hub can make a significant difference in your results and reduce frustration, promising an excellent finish every time if you follow these fail-safe steps.
Master spray paint projects with Spray Paint Hub
Common spray paint problems are a part of the DIY learning curve, but with the right knowledge and high-quality tools, they are entirely manageable. Don’t let a few drips deter you from the incredible transformation spray paint offers. Explore the wide range of high-quality spray paints, primers, and essential accessories at Spray Paint Hub and achieve a truly flawless finish every time!
Comments are closed here.